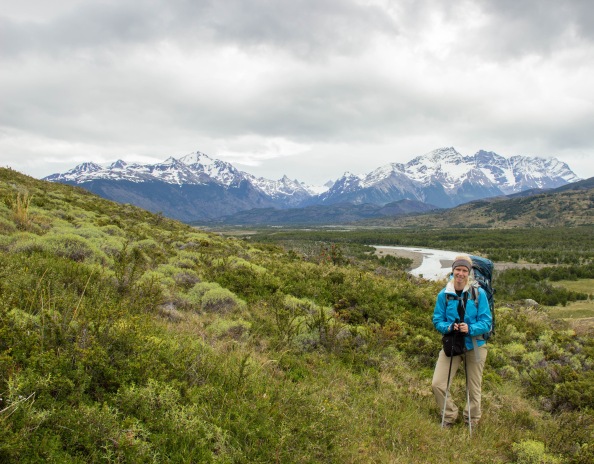
It has taken me quite awhile to complete this post, but it was well worth the wait! Below you will find my first-hand account of hiking the trail with my husband, along with helpful tips and countless pictures documenting my experience. Whether you already have plans to visit Torres del Paine or possibly just a lust for travel inspo, I hope you enjoy it!
On a more personal note, the memory of this hike has become all the more special to us because we found out midway that we would be expecting our first baby! About 4 days into the circuit, I started suffering from horrible first trimester symptoms, which made the trek all the more challenging for me. At the time I was absolutely miserable, but now looking back, it makes for an awesome first story to tell our son!
Now, back to the topic of Torres del Paine. There are 2 main routes you can take, the classic “W” or the more challenging “O”. Naturally, we opted for the “O”. A big determining factor for which route you take will be time. Many travelers do not have the luxury of infinite amounts of time and in that case, the “W” is a great choice. But, I must admit after completing the “O”, the “W” lacked awe-inspiring moments in comparison to the ones I encountered on the backside [trail from Camp Serron to Refugio Grey] of the “O”.
Here is a map of the park including both the “W” and the “O”.
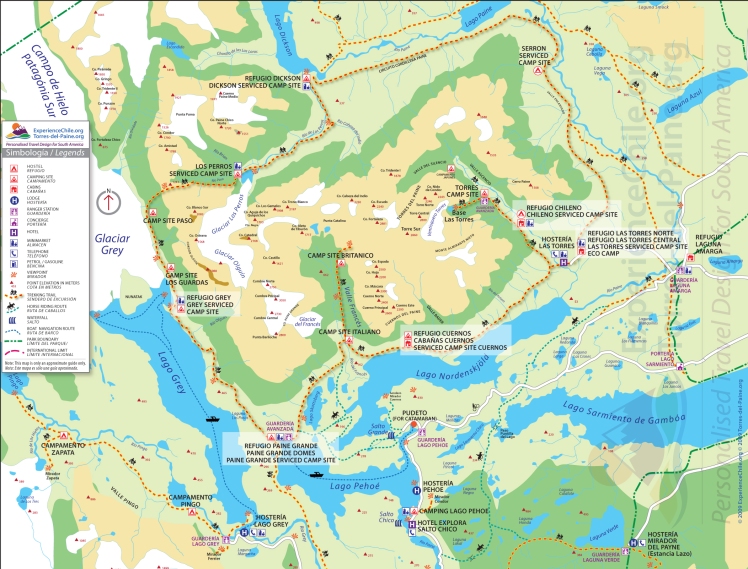
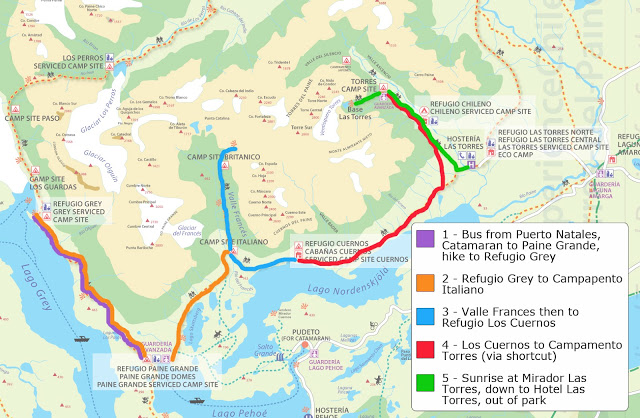
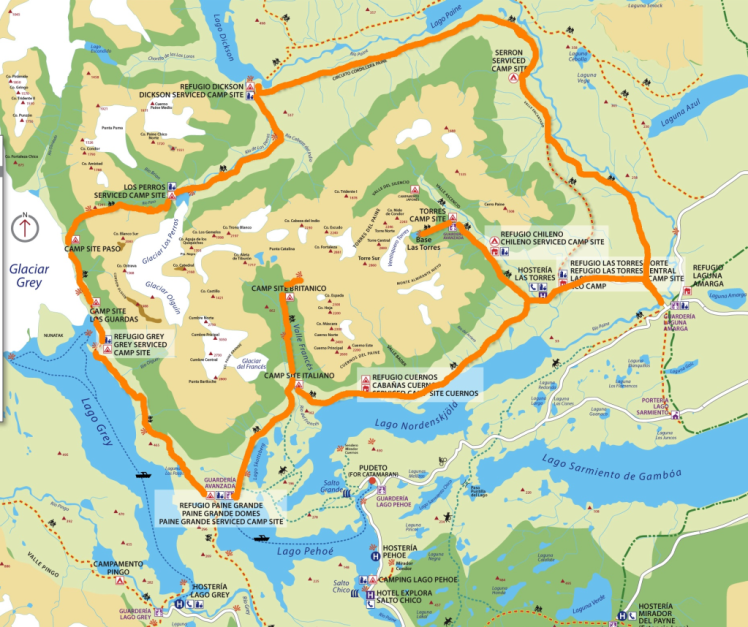
Below, I will include two more maps that highlight each individual route for your reference. But the map above is of much higher quality and will be most easily legible when referring to key locations.
“W”
“O” includes the “W”
Before I begin, I want to disclose the fact that there are a great number of ways to tackle both of these trails – the direction you trek [clockwise vs. counterclockwise], where you choose to camp overnight, number of days/stops, and your starting point – these are all factors that can greatly vary your experience! And as much as I would like to hash out every possible alternative [because there is also the “Q” for the overambitious], I am going to stick solely to my experience and the tips that I would recommend based on it – we went towards the end of December.
A few quick facts about the “O” Circuit:
- Takes anywhere from 6-10 days to complete
- Roughly 110-120 km
- Terrain is challenging, but doable!
- Stunning views, you will pity those who opted for only the “W”.
- The camp sites on the backside of the trail are much more primitive in comparison to the ones located along the “W”, be prepared for pit toilets and not much else.
- We chose to hike the “O” counterclockwise. And I highly recommend that you do the same.
Day 1 – Camp Serron
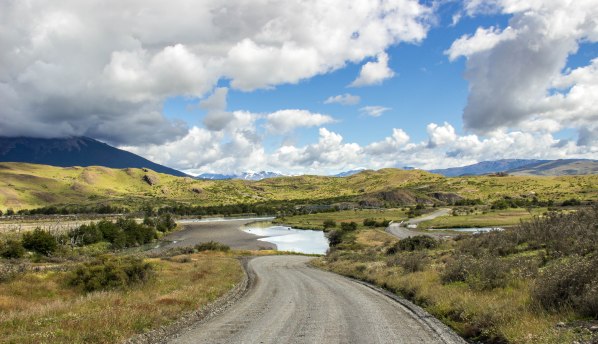
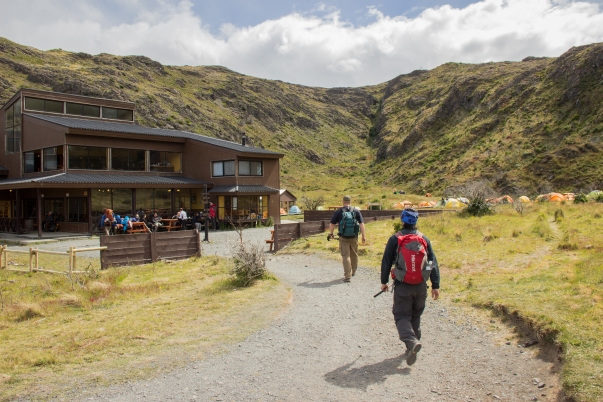
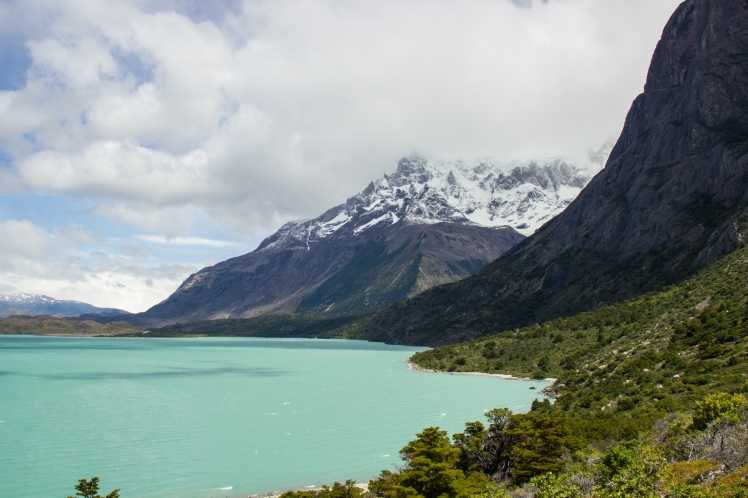
The night before our trek we stayed at The Singing Lamb in Puerto Natales. They arranged for a bus to pick us up at 7:15 am and we arrived at the park entrance at Laguna Amarga at 10:30 am. There, we signed some waivers, paid the park entrance fee of 18000 CLP, received a map, and watched a safety video. After all of that was taken care of, we hit the trail and headed to our first stop, Camp Serron.
The hike was very mild and a great warm up to our adventure. The terrain was flat for the majority of the time and it was a good opportunity for us to start fine-tuning our packs for optimal comfort for the tougher days ahead. It took us about 4.5-5 hours to reach the camp and by no means were we trying to blaze through the first day – we kept our pace moderate and steady.
The campsite itself was very nice! Take advantage of this while you can, because you won’t be seeing such luxury later on in your trek until you hit the “W”. We paid 7500 CLP per person for the site. There were free hot showers and a shack that sold food, alcohol, and rental gear – so bring some extra cash if you are looking to reward yourself at the end of the day.
Tip: Bring plenty of sunscreen and bug spray! The mosquitoes were nasty and relentless at this campsite. And wear lots of sunscreen because you can easily fry even on a windy, cloudy day. On the first day, William got a painful sunburn on the tops of his hands! Aside from his face, it was the only part of him that was exposed and he never thought twice about putting sunscreen there, so watch out!

Day 2 – Refugio Dickinson
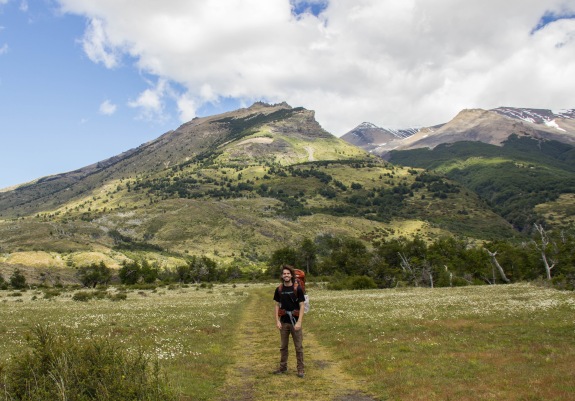
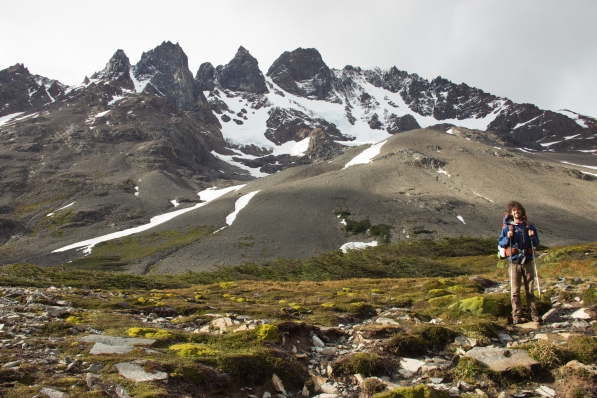
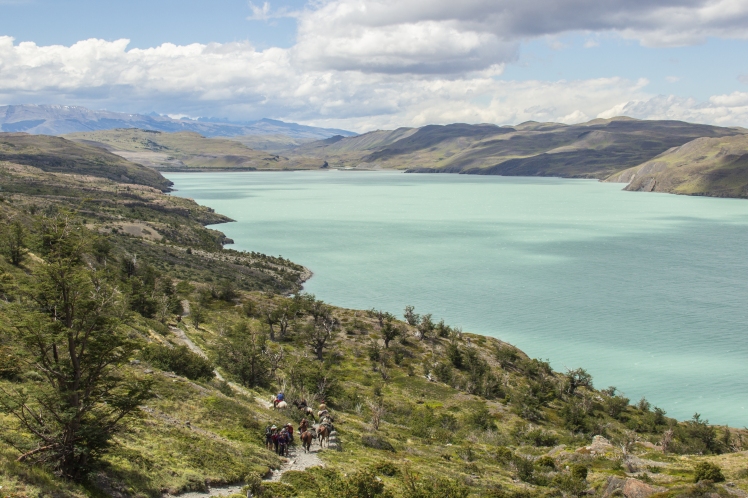
Camp Dickinson was one of my favorite spots! It was also one of our longest days and the trail felt like it was never-ending. The hike itself wasn’t very challenging, it just took forever [7 hours to be exact]! As you wrap around the hillside, you will encounter your first steep incline. It’s a good taste of what’s to come later on in your journey! Then the terrain goes through some gradual sloping hills as you hike around the lakes and come to a meadow where it all flattens out. As you near the campsite, you will start to head uphill again to capture a gorgeous view of the refuge before heading downhill and ending your day.
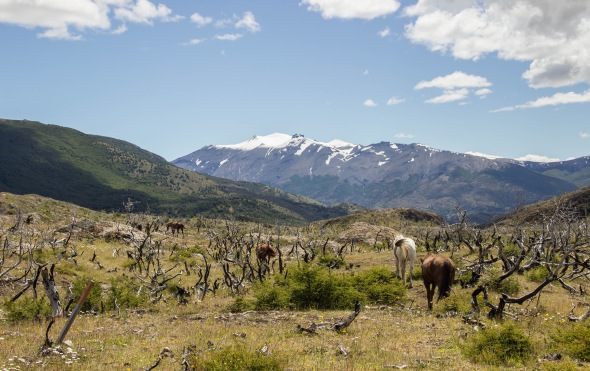
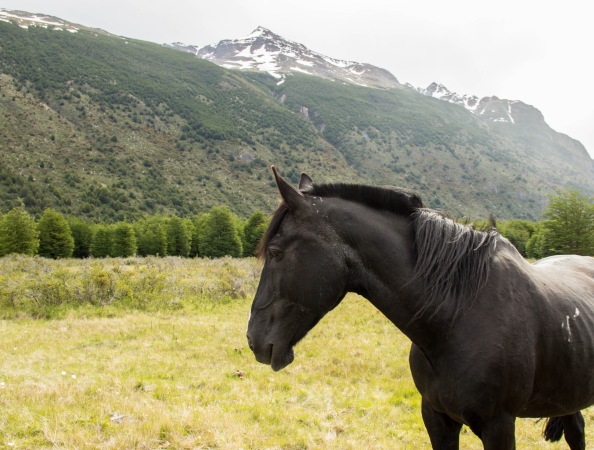
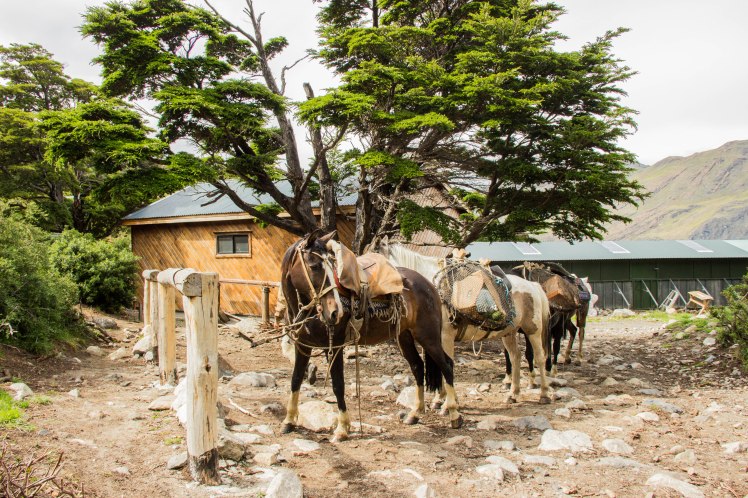
The campsite was nice. On a clear day, you can see the famous towers from your tent. They offered warm [if you are lucky] showers, food and drink for sale, and gear to rent. The cost was 6000 CLP per person to camp. There were a ton of gnats at this camp, which was an improvement from the mosquitoes at Serron. Probably my favorite part about this campsite was the neighboring pack horses that were resting from a long day’s haul and they would amble around the campground as they pleased.
Tip: Bring a windbreaker! On the hillsides, the winds were very strong and a bit jarring at times. I also wore my Buff which really helped to protect my ears.

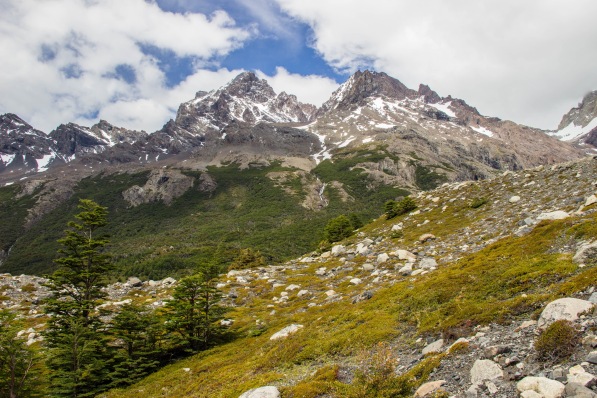
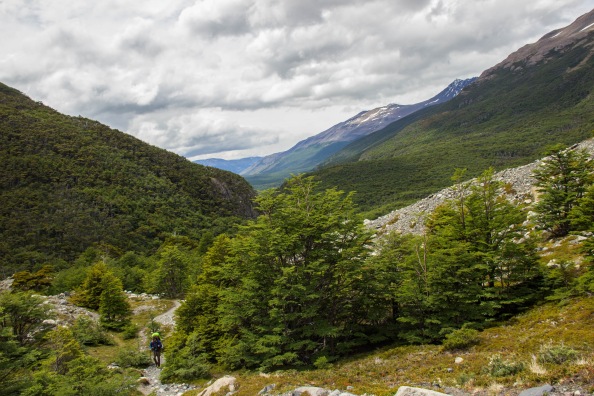
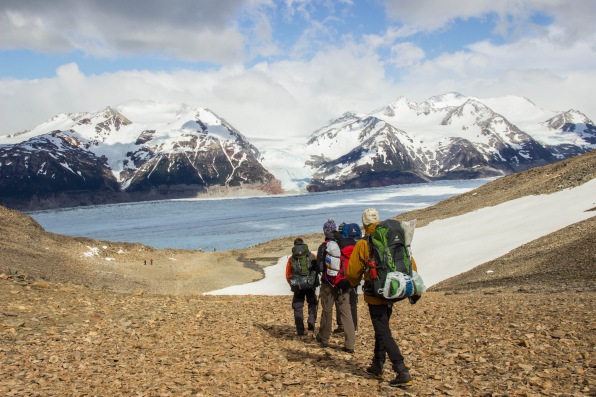
Day 3 – Camp Los Perros
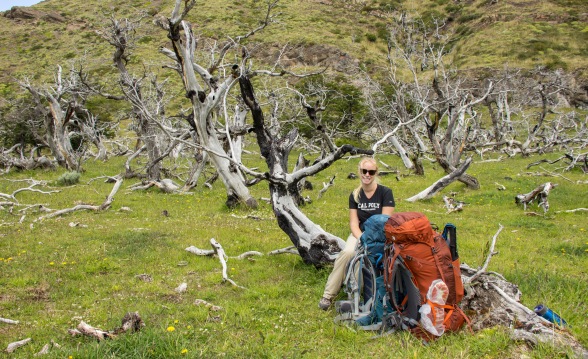
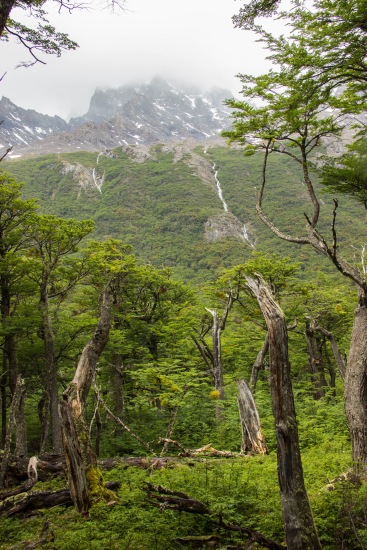
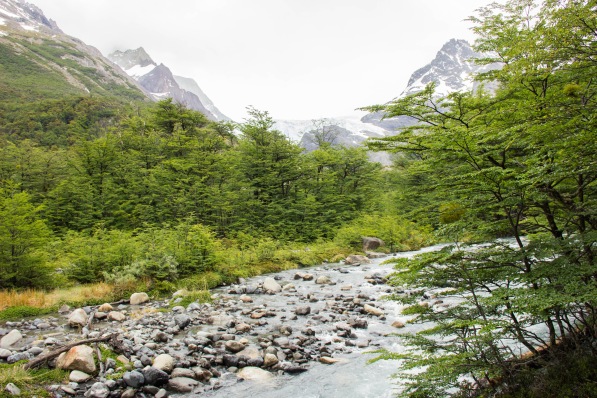
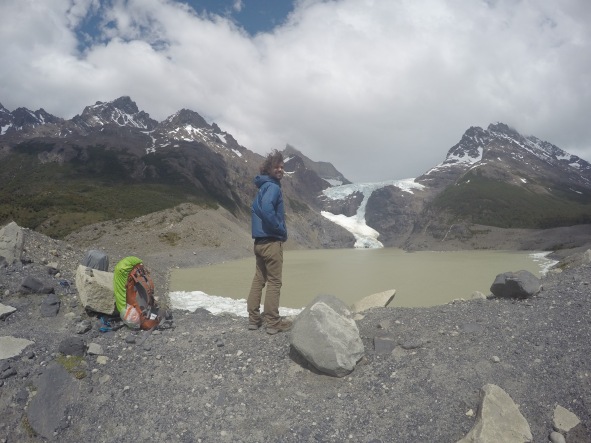
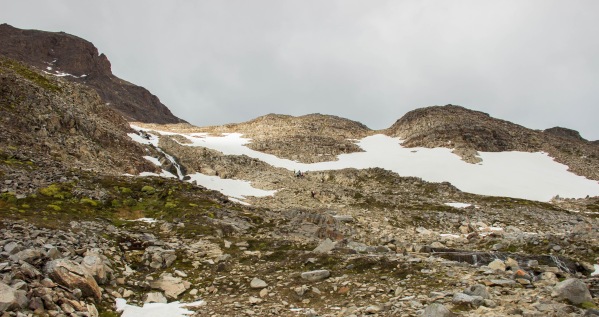
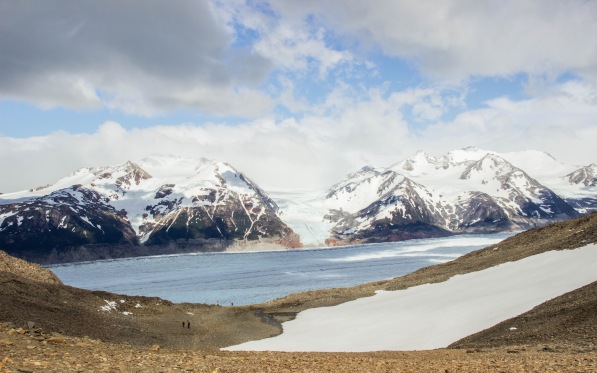
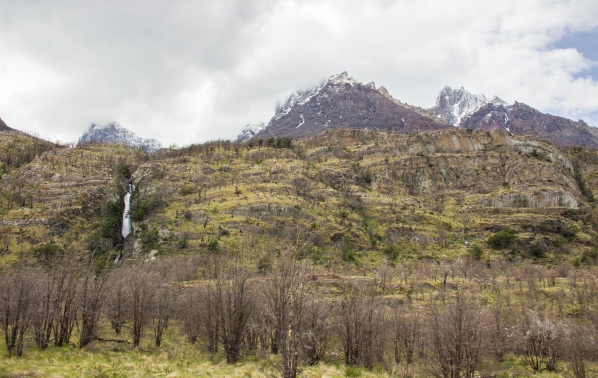
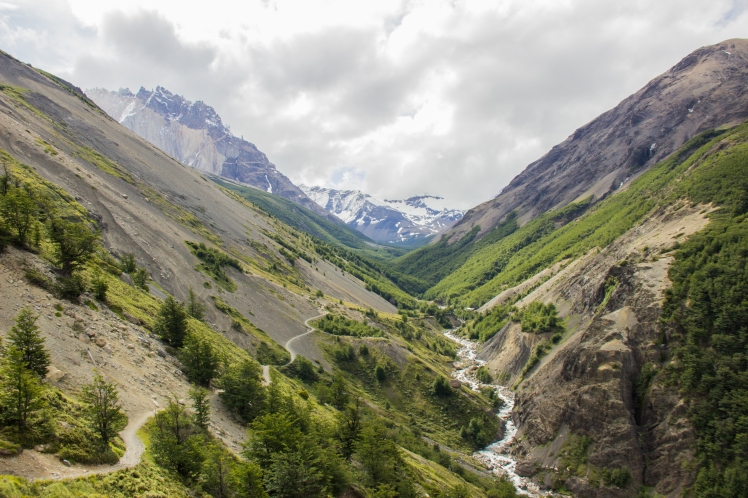
On day 3, we hiked to Los Perros campground. This stretch was relatively easy in my opinion, or maybe it was just my body starting to get used to the idea of these daily treks. It took us 6 hours to complete and the terrain was mild. We hiked through some foggy forests that reminded me of Washington and then towards the end we climbed a rocky incline that brought you to the lookout point of Glacier Perros. Just past this point, you will arrive at camp. Rest up, because tomorrow is a big day!
Tip: If you have 30 min to spare, take a seat and wait to see if you’re lucky enough to witness the glacier calving – we were!
Tip: Go to bed early because you will want to leave the camp at dawn in preparation for the big day to come.
Day 4 – Camp Paso
It was recommended to us that we wake up at 5 am and leave camp by 6 am – and we did just that! The more time you allow yourself for today, the better. Now, if the weather is bad or the ranger reports the possibility of a storm, heed this advice and stay another day at the camp! If the weather does not permit for you to see the markers on your path, turn back around and wait another day. Trust me, this is not a path that is easily established if you can’t spot the markers.
Tip: Check in with the ranger for a weather report the night before. The ranger has the power to close the pass for the day if he feels that hikers are at high risk due to unfavorable weather conditions. He also has the power to not let people pass if they hit the trail too late in the day – so get an early start!
Now that I have given all of my warnings on safety, I am happy to report that our hike over the pass went very smoothly! We lucked out with it being a beautiful clear day and we were not hindered by any severe weather conditions.
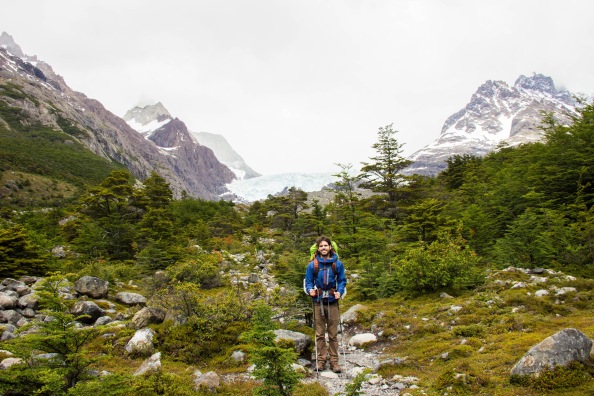
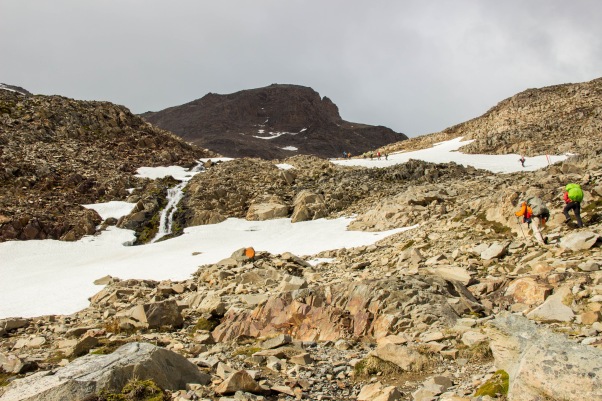
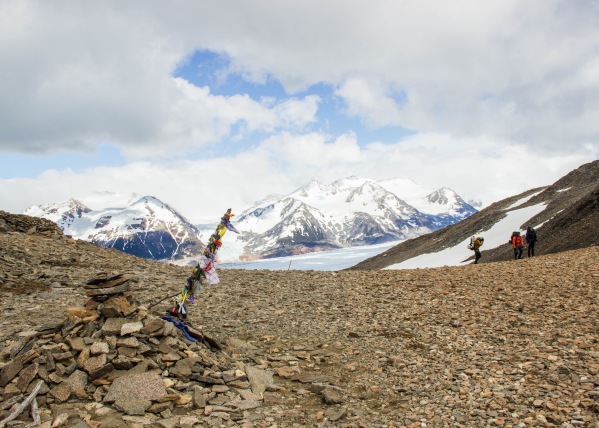
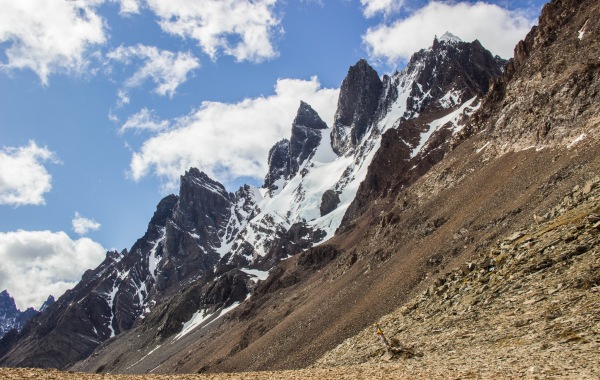
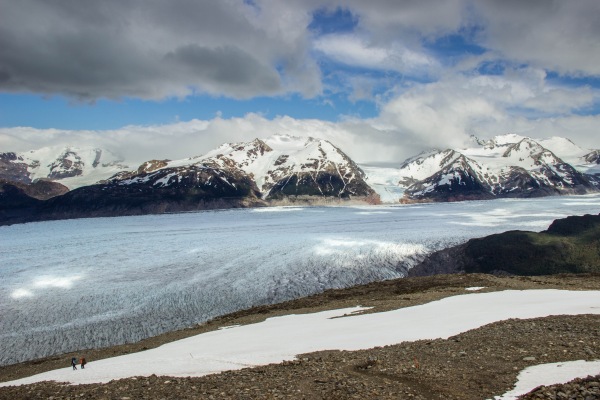
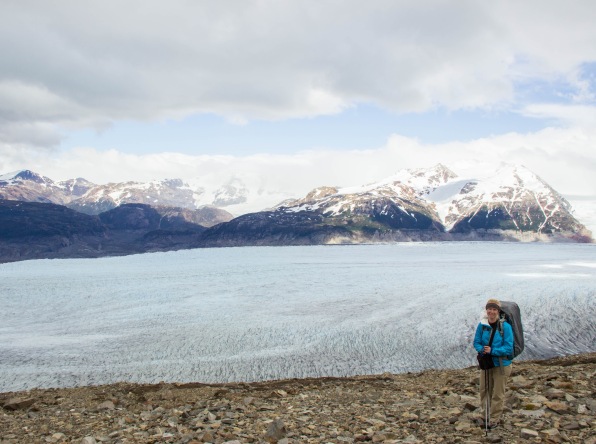
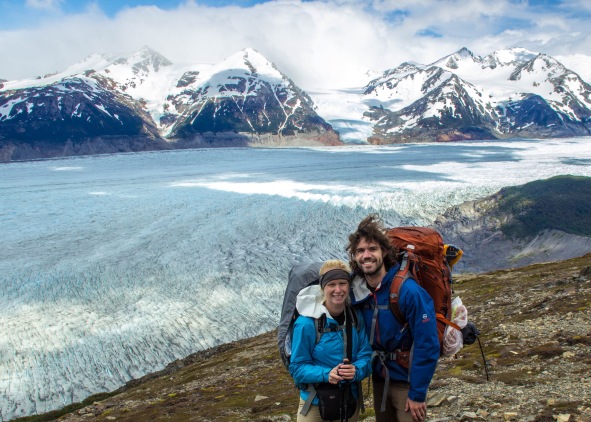
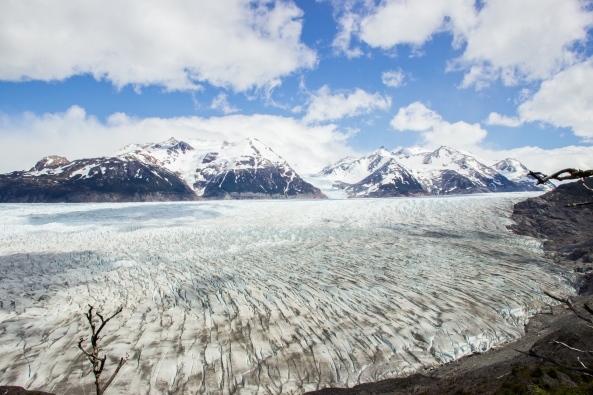
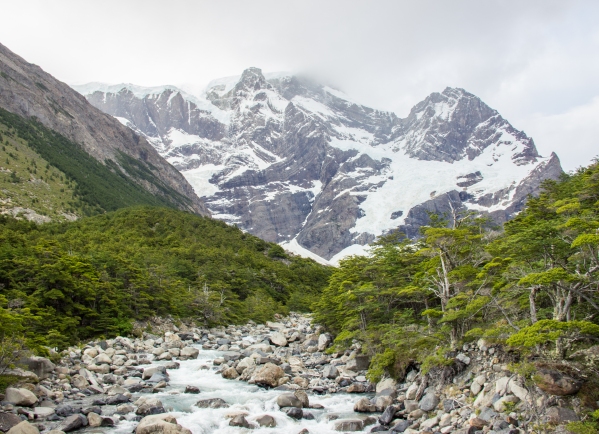
Physically though, this day was very challenging. The moment you leave camp, you start climbing up hill. This is to be expected though as you are climbing over a mountain pass to get to the other side – so be prepared! We encountered some snow along the way and I couldn’t imagine climbing these steep snowy inclines without my trekking poles. The snow was very slippery and my poles had caught me more than once as I made my way up the mountain. After a few solid hours of climbing up, you will be rewarded with a stunning view of Glacier Grey. It was the highlight of my entire trek, and the relentless climb that led up to this moment only made it that much more rewarding!
We stopped to eat lunch and took a ridiculous amount of selfies. Enjoy yourself!
Little did I know, the hardest part of my day had yet to come. If you think the uphill portion is bad, wait until you start hiking downhill. The decline of this hike was brutal on my body. The steep trek down was marked by a never-ending series of oversized stairs that sucked the life out of my joints little by little, step by step. We had talked with several hikers along the way wondering if they were experiencing the same painful sensation and sure enough, no one had expected the downhill portion to be harder than the initial uphill climb.
Tip: I couldn’t imagine accomplishing this day without my trekking poles. They helped to stabilize and support me the entire way. Here are just a few examples of what I might have encountered without my poles…
- Slipping and tumbling down a snowy mountain
- Breaking my ankle when I would lose my balance…on several occasions
- Needing knee replacement surgery
- Face planting in the mud
I failed to mention this earlier, but as the snow melts with the oncoming of summer, the trails become very muddy. I’m talking swamp-like nastiness for long stretches at a time. And there was no way around it. For some people, they didn’t care. They marched right through the soupy, sticky mud that was ankle deep. Me, I care. And unfortunately this made for a bit of a challenge as I tried to emulate the acrobatics of an uncoordinated cat that was hindered by an extra 20 lbs on its back. So yes, as I was perched on the skimpiest of branches trying to catch my balance, my poles saved me several times from ending up face down in the mud.
The most unfortunate part about this hike was ending our day at the worst campsite we had yet to encounter. Many hikers found it so unappealing that they mustered up enough strength to hike another 5 hours [!!] just to reach the next campground, Refugio Grey. We thought they were insane at the time, but after spending a night at Camp Paso and then arriving at Refugio Grey the next day, it makes a lot more sense!
- Camp Paso offered no food or drink for sale and the showers they had were ice cold. Also, the bathroom was a repulsive pit toilet that had a rope handle for you to hold onto as you squatted. And to no surprise, this campsite was indeed free of charge.
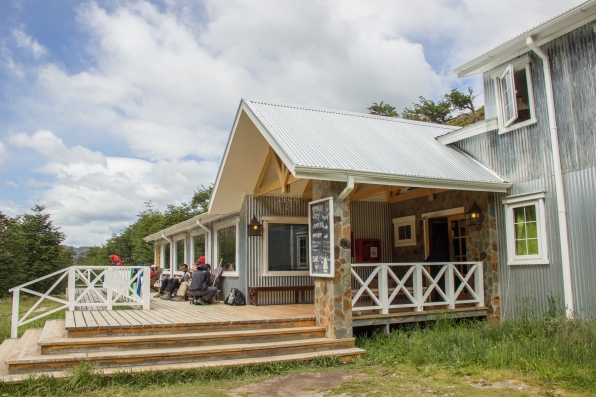
- Refugio Grey was essentially a hotel. They had cabins to sleep in, super nice restrooms, hot showers, a cafeteria, and even a nice little deck patio where you could lounge all day and play card games!
Now having experienced the two, it makes a lot more sense why hikers would tough out the extra 5 hours for a relaxing night at Refugio Grey. The choice is yours! See how your body feels after conquering the pass and decide from there. Refugio Grey is also the start of the “W”, so congrats, you completed the backside of the circuit!
Tip: Sites on the map marked “refugio” = nice accommodations! i.e. bunks in cabins to rent, food and drink for sale, warm showers, and generally a great hall where you can rest, read, eat, and relax. If you don’t book a bunk in advance, don’t worry, all refuges accommodate camping as well.
Sites on the map marked “camp” = just that. Camping only. Generally there is a cooking shelter, some running water, cold showers, the occasional snack shack, and some form of a bathroom. Don’t expect much else.
So please take note of my distinctions when I label sites “Refugios” vs. “Camps”.

Day 5 Camp Italiano
Day 5 was a long day! I woke up that day feeling very sore and a bit sick to my stomach. No food in my pack sounded appetizing and I was already looking forward to the day’s end when it hadn’t even started. Looking back, it all makes sense now because I was right in the middle of my first trimester of pregnancy and suffering from common symptoms – morning sickness, food aversions, and endless fatigue! This is where my details start to become a bit hazier as I was just trying to get through the rest of the excursion in one piece.
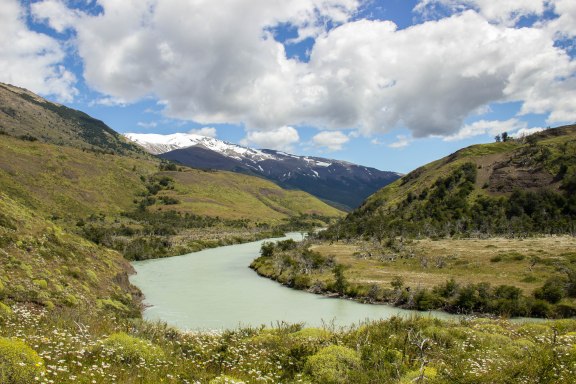
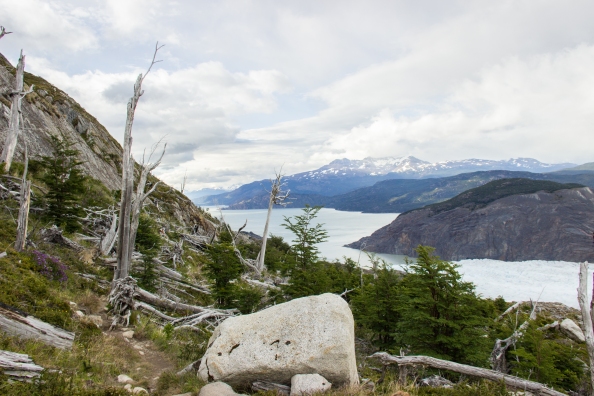
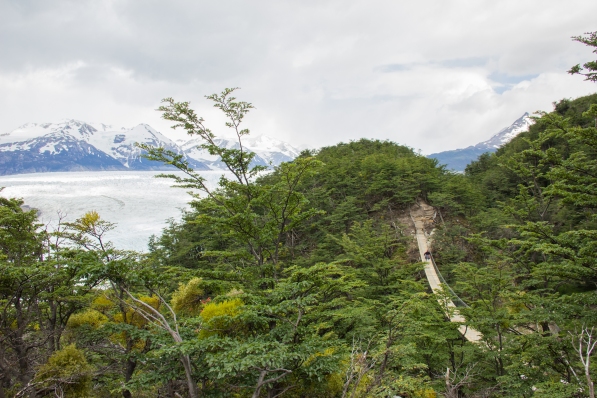
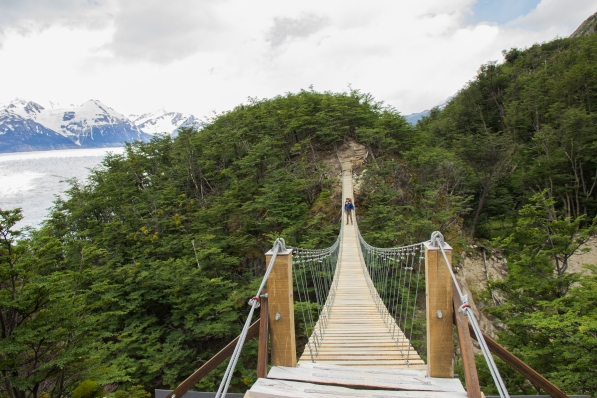
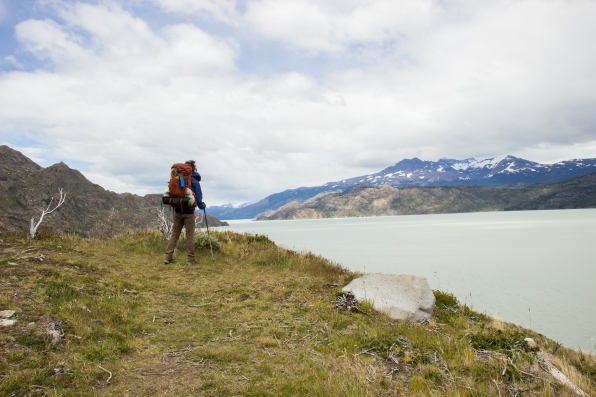
Our original plan was to hike from Camp Paso to Refugio Grey to Paine Grande. But I wanted so badly to be done with the trip, that we pushed on to Camp Italiano. It’s definitely doable because the terrain was very mild in comparison to Day 4’s climb. From Paso to Refugio Grey, you will skirt along a cliff that I found to be a bit unnerving which quickly became frightening when the high winds would start to pick up. Again, so happy to have my poles for stability! Surviving the winds and scrambling to the top of the hill, we came across my next challenge – a very intimidating suspension bridge. For people who are not afraid of heights, it’s no problem! For people who are, like myself, it is a big problem. As we approach the bridge, I am already on the verge of tears as I shake in my boots considering whether or not I want to turn around. At the foot of the bridge there is a sign that reads, “4 person maximum.” Great. So it’s certainly not the strongest bridge either and maybe I do have good reason to fear this bridge.
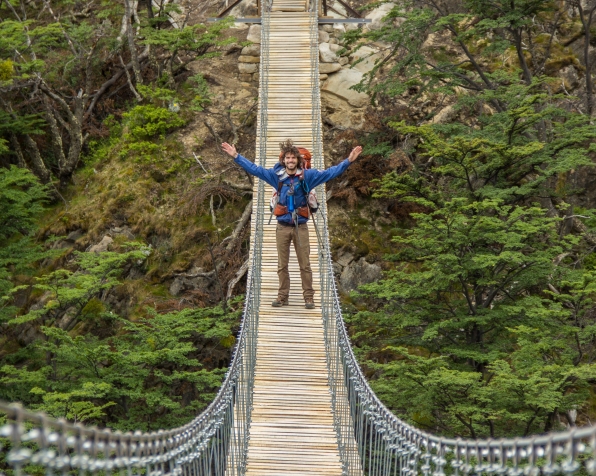
Luckily, William was there to encourage me on and make me suck it up and face my fears. I made him promise me that he wouldn’t let anyone pass him onto the bridge as I was crossing. The winds were strong and swaying the bridge a good bit, the last thing I needed was another person adding to the motion. Inch by inch, my face running with salty tears, I crossed the bridge. After that, there is a second bridge to cross but it isn’t nearly as scary as the first.
We made it to Refugio Grey and had some lunch in the cafeteria. If I remember correctly, this place even took cards! But bring cash just to be on the safe side. Entering Refugio Grey was like night and day in comparison to the past few days we had spent on the backside of the trail. Now that we had entered the “W” portion of the trek, the path was much more populated with tourists and the accommodations from here on out were significantly more luxurious. After lunch, we continued on to Refugio Paine Grande – another swanky cabin with full amenities. We didn’t stay long though. Just long enough to have a snack and head out for Camp Italiano.
Tip: During peak season, rangers will require that you reserve a spot for Camp Italiano due to limited space. You reserve your spot the day before or the day of depending on where you reserve it and how strict they want to be. We reserved our spot the day of at the Paine Grande ranger station before continuing on to Camp Italiano.
Just a couple hours later we arrived at Camp Italiano. If there were a worse place than Camp Paso, this was it. The camp site itself was alright, but you had to get all of your water from a nearby river and the bathroom conditions were unspeakable. I’ve literally never witnessed something more repulsive in my life than those nasty outhouses.
By now, my food aversions were worse than ever and I couldn’t stomach a single thing in my pack. I snacked on a few crackers before passing out.

Day 6 Refugio Chileno
I woke up to horrible morning sickness and was still unable to stomach any of my food. Of course at the time I had no idea that I was pregnant and wrote off my symptoms as some kind of annoying “flu”, although I was starting to have some sneaking suspicions..
So on we trekked! Not like I had much choice anyways.
From Camp Italiano, you are supposed to make a day hike to Valle de Frances and stay another night at Italiano. But when we woke up, the weather was cloudy and rainy and not at all ideal for sightseeing. So we skipped it. Which I really don’t regret because after talking to several hikers who had visited Valle de Frances, they said its unimpressive views really didn’t make it worth their time.
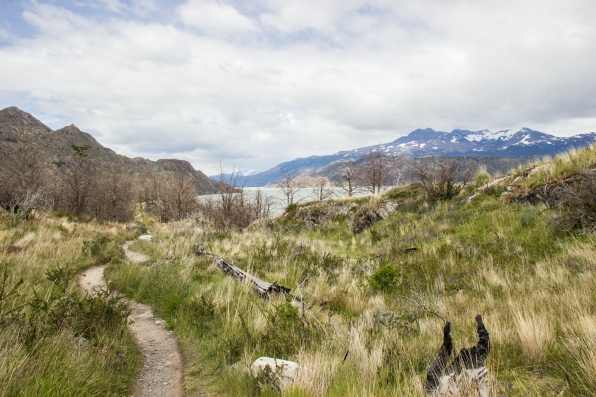
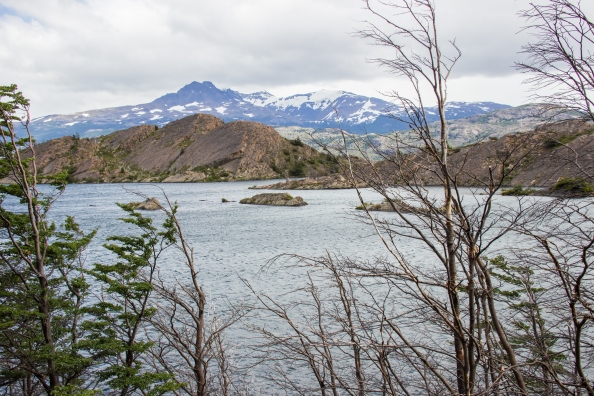
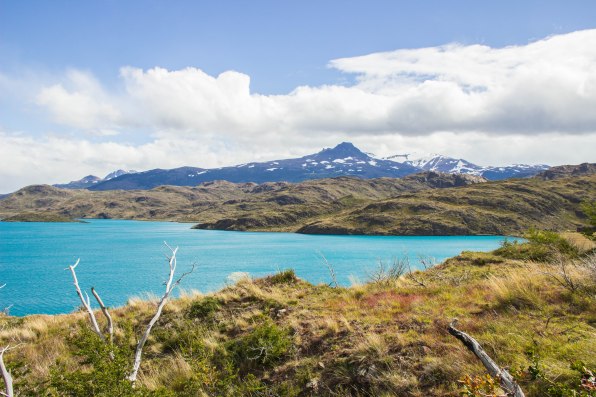
Leaving Camp Italiano, we headed straight to Refugio Chileno. The views along the way were really nothing special. We skirted along a lake almost the entire time so there was not much to “ooh” and “ahh” over. By now, our bodies were fatigued from the previous 5 days and Day 6 made for my toughest day yet. It was also the most boring day for scenic views which made the hike all the more challenging with no aesthetic distractions. The final stretch before Refugio Chileno is a brutal uphill battle – a great way to end a lengthy 8-hour hike!
The Refuge itself was quite nice. The tent camping is on these individual raised wooden platforms that are spread out throughout a hillside. There is also a cafeteria and warm showers available. If I hadn’t suspected my pregnancy at this point, I would have treated myself to a glass of wine in the dining hall before tucking in for the night.
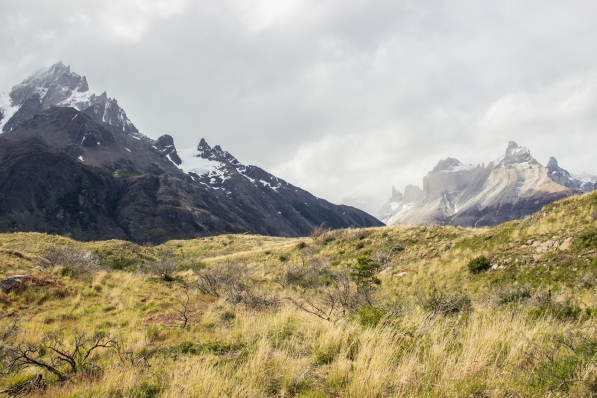
Tip: Along the way, you will pass Refugio Cuernos and the rumors are true. Refugio Cuernos does have wifi – rejoice! I think the first 10 min were free and then after that you pay a pretty penny for its service. I used my free minutes to notify my family that I indeed was still alive after 6 days in the wilderness and that I was more than ready for it to all be over. Again, the pregnancy really put a damper on my enjoyment of this trek!
Tip: About 5 hours into your trek, the path will split and you will have two options – the shortcut to Refugio Chileno or the path back to civilization aka Hotel Las Torres. Unless you are looking to tap out on the final stretch of your excursion, take the shortcut to Refugio Chileno. You can do it – you’re almost there!
Day 7 Mirador of the Towers
The much anticipated final day – visiting the Mirador of the Towers! It is highly recommended that you get up roughly 1.5 hours before sunrise and head up to the towers for the ultimate sunrise experience. It is also recommended that you bring with you your sleeping bag because otherwise you will freeze up there as you wait for the day’s first light to hit the rock. Because my morning sickness was only getting worse and I was practically starving from my lack of appetite to anything and everything, we opted out on the sunrise hike. I talked with several people who experienced spectacular views of the towers at sunrise…and I have also met some less fortunate people who nearly froze to death waiting for those spectacular views that never came due to bad weather. It’s all a gamble with the weather, but I say take your chances and go for the sunrise hike if you are feeling up to it! It is supposed to be the best chance for good weather and great views of the towers. If you wake up the morning of and the weather seems stormy, go anyways! You never know what the weather will be like in an hour, it’s very unpredictable.
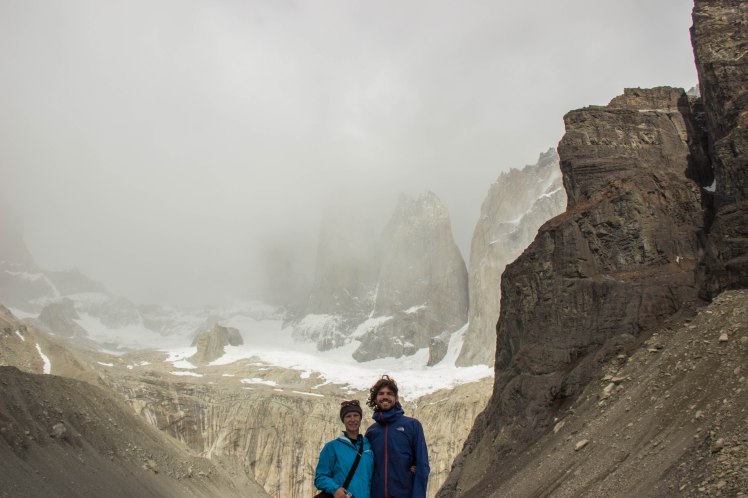
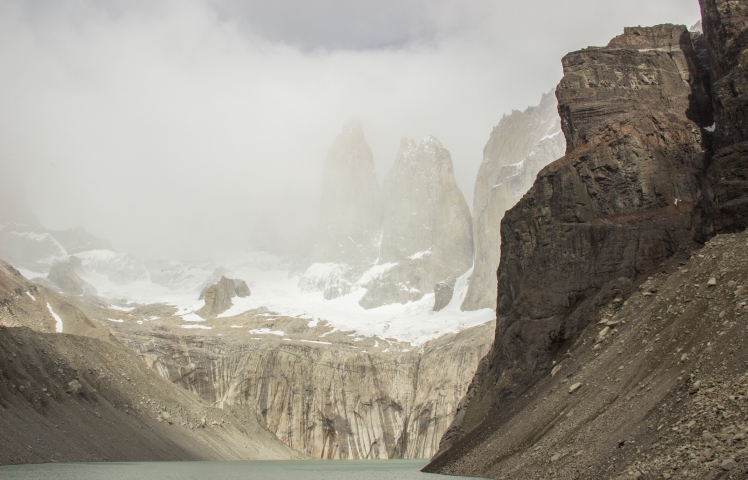
Instead of doing the sunrise hike, we took our time in the morning packing up camp and fueling up on some food before heading to the towers. The climb is steep, but it is much easier to handle when you don’t have your huge pack on you [leave that at the refuge!]. When we got to the top, the towers were hardly visible in the misty haze surrounding them. We waited probably about 30 min. to see if things would clear up, but they didn’t. Every now and then the towers would peak out from the clouds and we would get a good view, but we certainly didn’t luck out with a clear blue sky.
Afterwards, we headed back down, grabbed our packs and headed to Hotel Las Torres. The hotel is super nice and we rewarded ourselves with a tasty hot meal at the restaurant. You can talk to the front desk and they will let you know when the next shuttle arrives to bring you back to the park entrance where you will then grab a bus back to Puerto Natales. Times and details on these buses should be researched and planned for in advance!
Tip: I haven’t talked much about the weather yet. But the weather in the national park is EXTREMELY unpredictable – in both good ways and bad ways. Because the park sits in its own microclimate facilitated by the surrounding glaciers, its weather is very radical and can change at a moment’s notice. Be prepared for anything at any time. I always had on hand my Buff, lip balm, hard shell rain jacket, sunglasses, and sunscreen – keep these things easily accessible for when wind, rain, and hot sunny rays come your way. I also always kept my rain cover on my pack in preparation for those random rain showers we would hit every so often. Don’t be alarmed if you check the weather forecast in advance and see some chaotic stormy predictions for the days of your hike. On the day we headed to the park, our 5 day forecast was filled with thunderstorms with the occasional sunny sky. Looking at that, I almost second guessed our plans and considered opting out. Thank goodness I didn’t because the forecast couldn’t of been more wrong. For the majority of our trip, we lucked out with amazing weather! Sunny skies most of the time, with occasional showers throughout the day. The wind was inevitable depending on which portion of the trail you were on and we only encountered snow on the day we hiked over the pass. So don’t let the weather discourage you! One morning it might be foggy and rainy, but an hour into the day and you might already be shedding off your layers because the sunny heat is killing you. Which reminds me, for clothes, pack in layers!
A bit of an anti-climatic ending to our journey in comparison to the gorgeous views we had experienced in the days leading up to this one.
Feel free to leave comments with any further questions/feedback you might have. It is a lot of information to cram into one post and I hope you find this post helpful if you ever find yourself deep within the beautiful wilderness of Patagonia!


Hi! Thanks for the post it is very helpful! My husband and I are planning to go in January but I am already freaking out over the bridge. Did you feel ok walking across? Did your husband walk right in front on you or behind you? I am to the point that I am not sure I want to do the hike because of the bridge!! Any advice would be great! Thanks!
LikeLike
Hi Rusa! I’m so happy to hear that you found this page helpful. Any questions you have, feel free to ask!
In regards to the bridge, you’ll be totally fine! When we went, the bridge looked brand new and in very good condition. I went before my husband and made sure that he didn’t let anyone else on the bridge while I crossed..because believe it or not some people will try and hustle past you on the bridge rather than just waiting a couple minutes for you to cross. So my advice would be to go before your husband and put your poles in your pack so that you can hold onto the railing as you cross – you could easily lose a pole off the bridge if you accidentally dropped one. And my one other tip for the bridge is to take a quick peek out and check out the view because it is truly incredible! 😉 And honestly, by the time you get to the bridge, there is no way your fear will be greater than your exhaustion. If it’s a decision between crossing the bridge or going back through the strenuous pass, the bridge will be a no brainer!
My two other words of advice for your trek:
1. Go counter-clockwise on the circuit
2. Bring poles! They will save your knees on the steep downhills and big steps that you’ll encounter after the glacier
Enjoy your travels! I would love to hear how it goes.
LikeLike